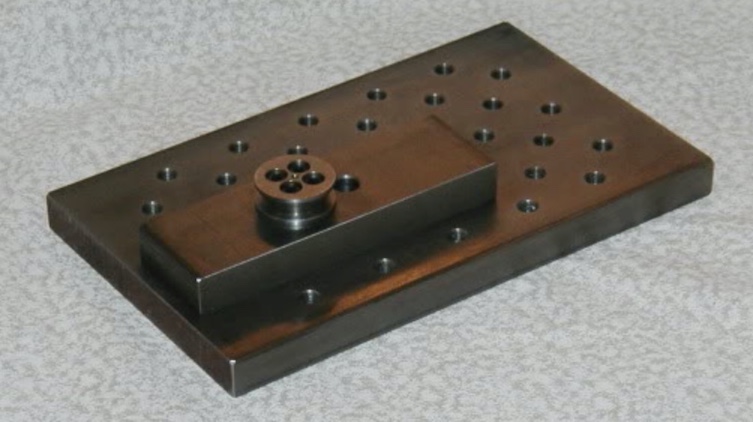
I purchased a milling attachment for the South Bend lathe at NAMES, but decided to also make a very simple plate for the cross slide to serve for simple milling operations. It consists of three parts: the table, an optional riser block, and the button to attach to the cross slide. The original author's picture of the upside down table is shown below.
This idea and plans are from a contribution to bbs.homeshopmachinist.net.
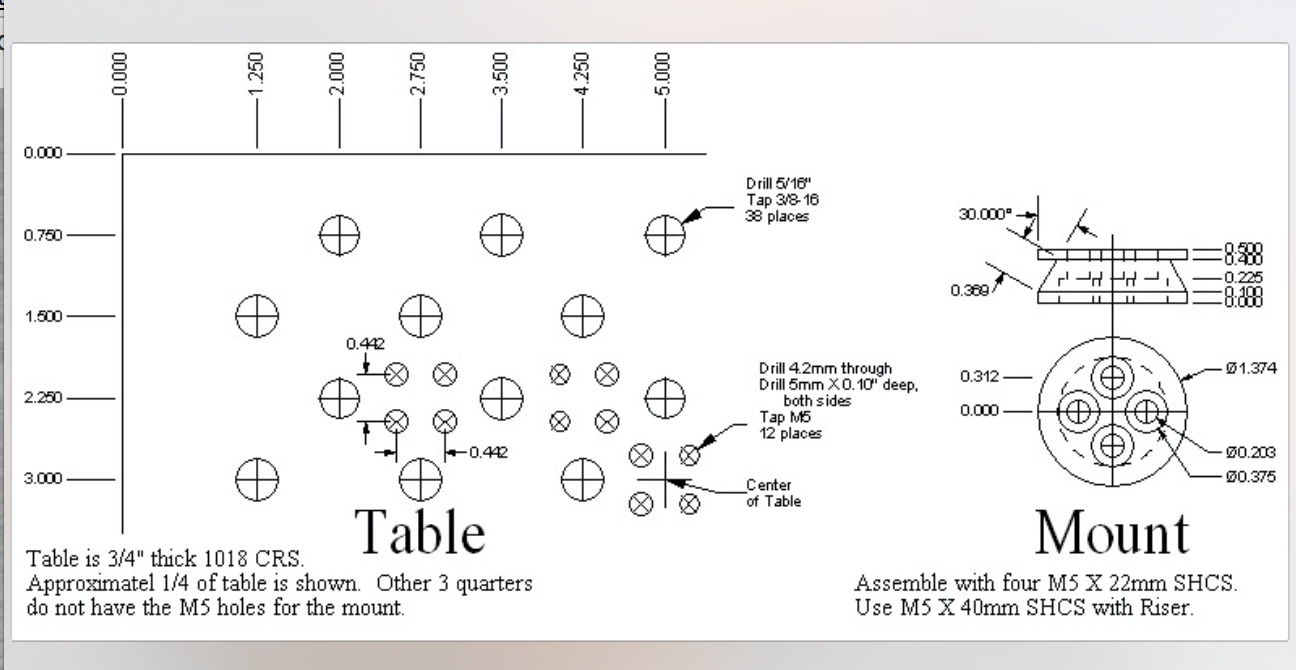
The table was the first part to be tackled. A 3/4" X 6" X 10" CRS plate was ordered and used as is. The hole centers were laid out with the fixed marking out blocks, 1,2,3-blocks and a 1/2" bar of steel. I accidentally drilled too many holes in one quadrant; forgetting that only every other intersection was to be drilled. The other three quadrants of the plate were drilled according to plan. The hole centers were punched and then drilled a few sixteenth's deep with a 9/64" drill bit. The hole was then drilled through and opened to 5/16" with a succession of three drill bits. The drill press in the garage was used for all drilling and did surprisingly well. Drilling took about 8 hours! The burrs on the bottom of the plate were removed with a file. All edges were also chamfered with the file. Tapping 3/8-16 then proceeded smoothly with a taper tap. The only challenge was securely clamping such a large plate to the workbench supported on 1/2" steel bars.
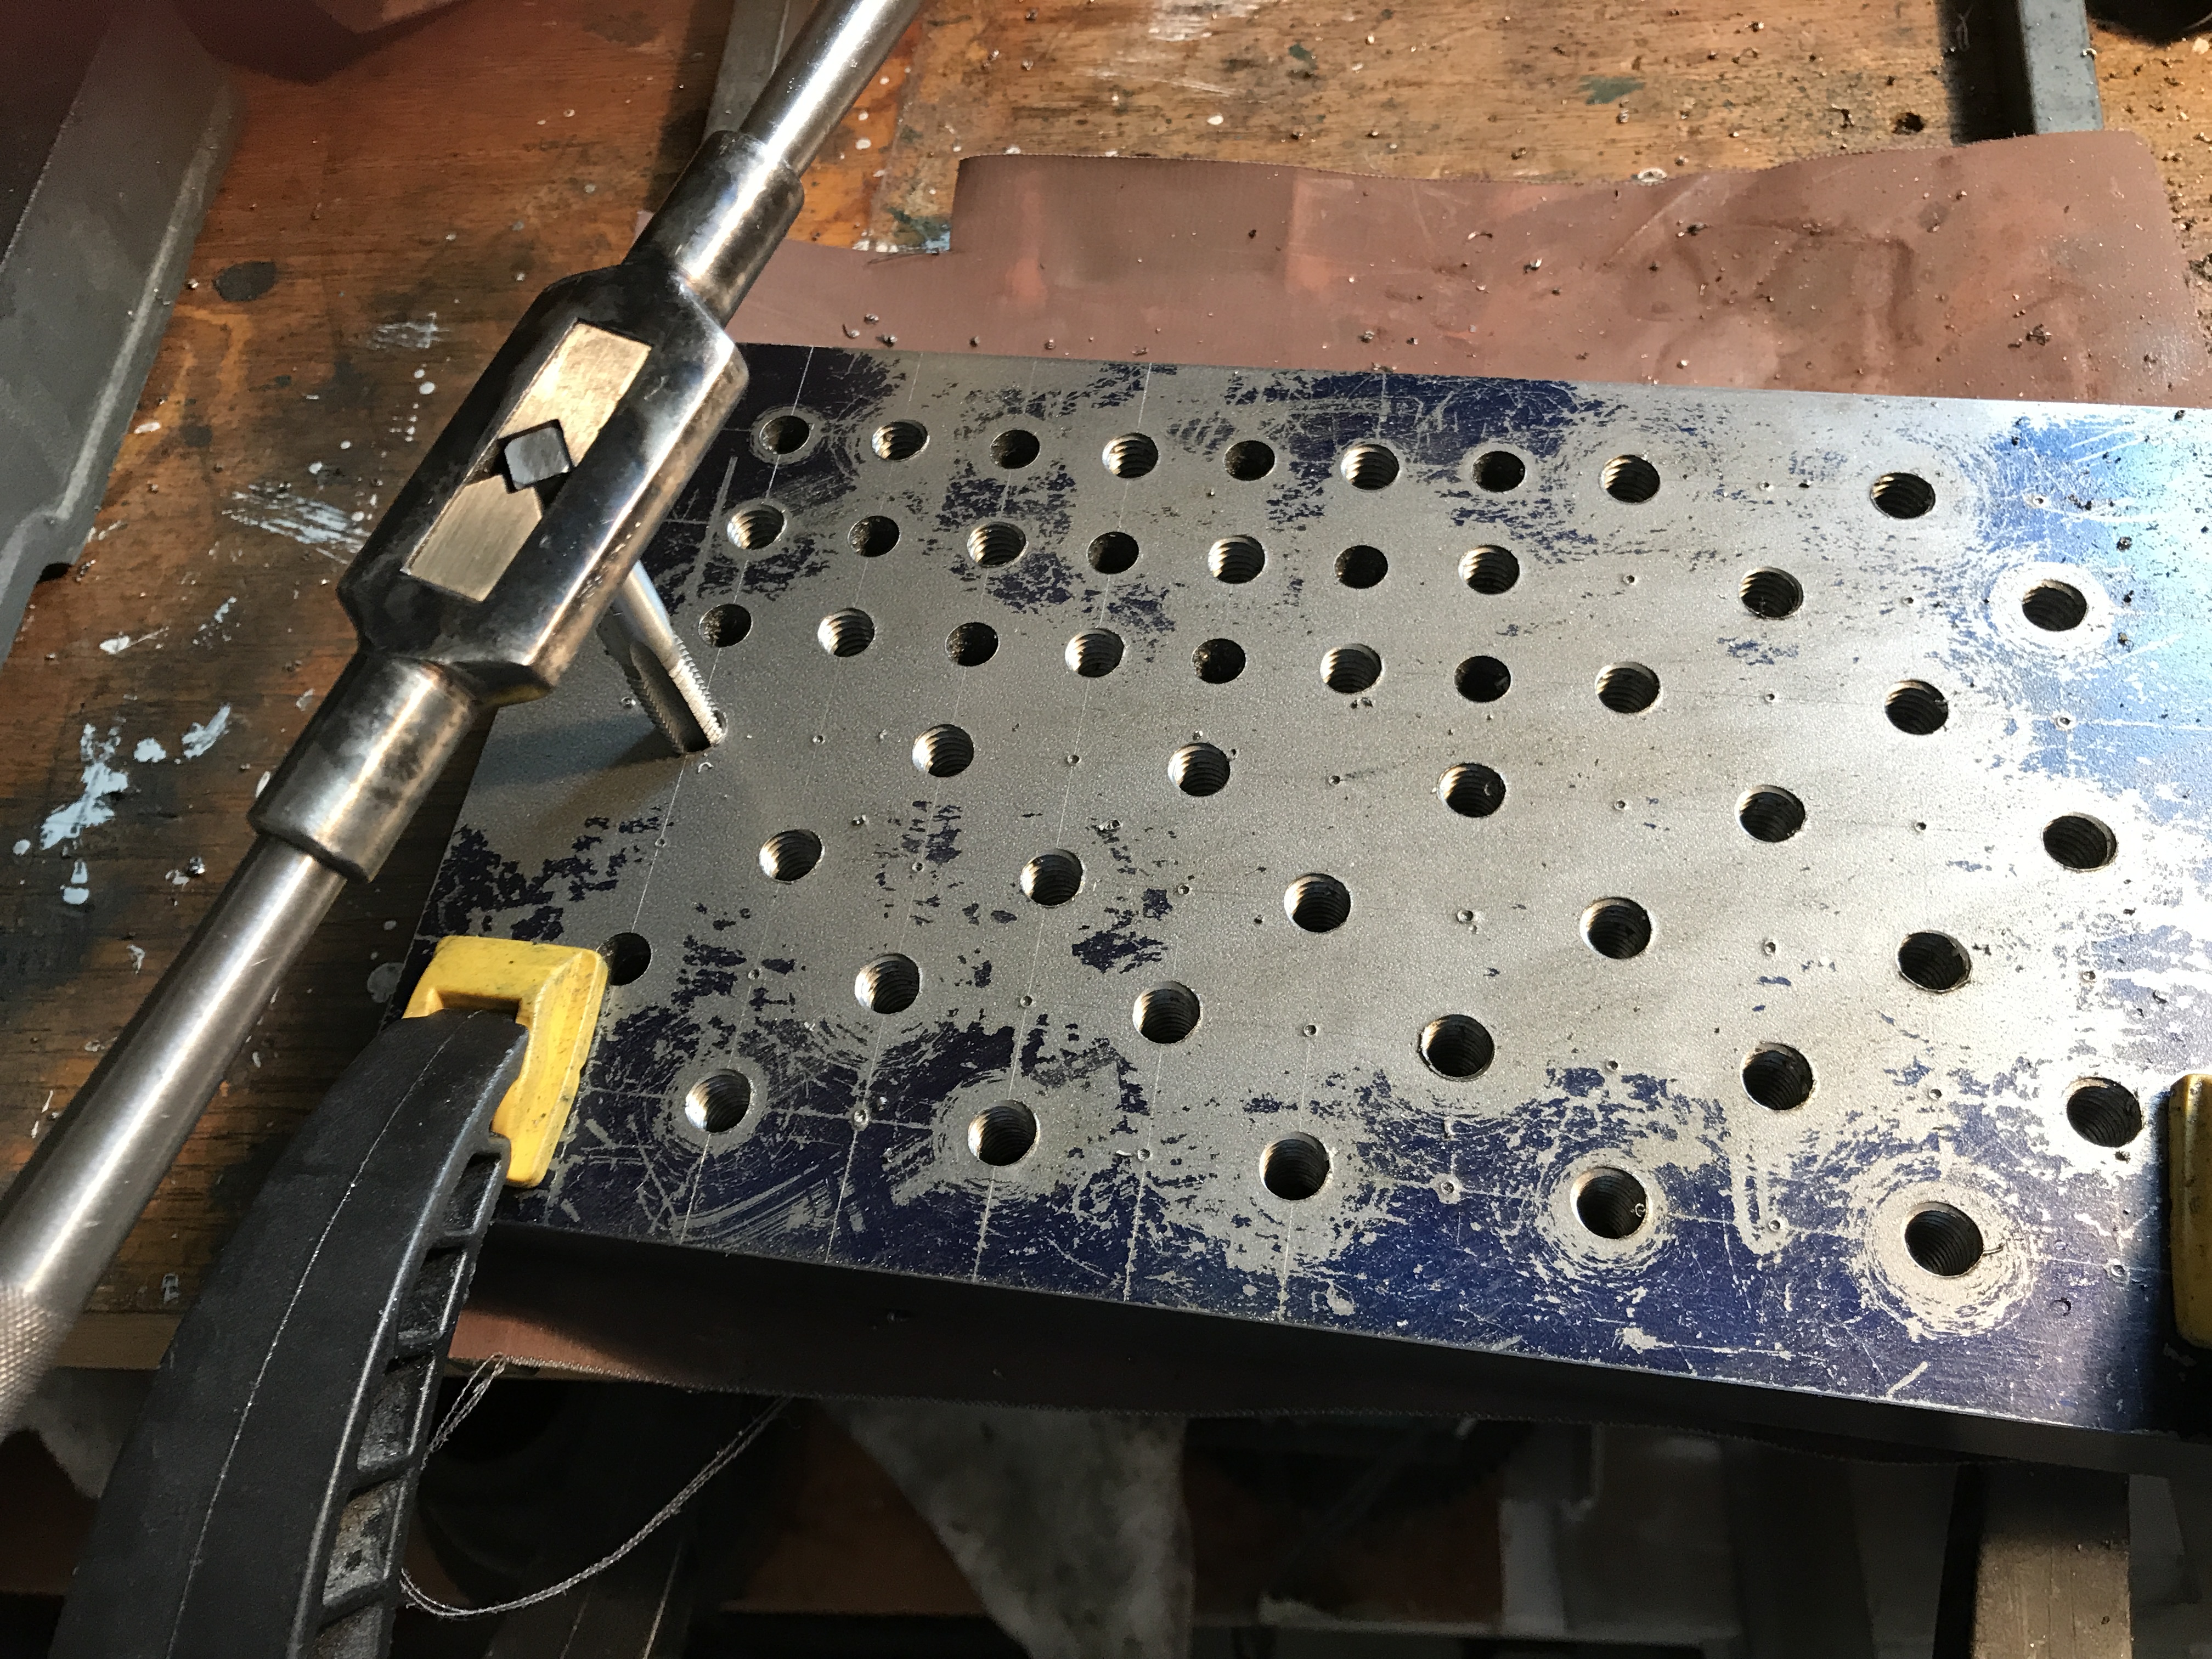
Took about an hour to clean up all of the drilling swarf! Maybe next time I will find a better way to contain the chips close to the drill press.
Cut off a 1" length of 1 7/16" steel round bar with the bandsaw. Chucked it in the South Bend and faced both ends. Moved to the Sherline and reduced 0.5" to 0.373". Realized at this point that a cutter with a <60° angle on the front was required for cutting the miter. Will need to make one prior to proceeding.
Made a 55° included angle lathe tool per the instructions in DevonThink/ Metalworking Projects/grinding lathe tools from Sherline. First one side of the tool was ground to a 10° angle with the table set at 7°. This was ground until the length of the cutting edge was about 1/4". Second, the opposite side was ground such that the included angle was 55°. Third, the top of the tool was pushed into the edge of the wheel and the tool was then rotated until the cutting tip just touched the wheel producing top rake (relief?). Finally, the point was 'broken' by setting the bottom of the point against the wheel and rotating until the tip of the point just touched the wheel leaving a small flat on the tip. Now I am ready to cut the taper on the mount.
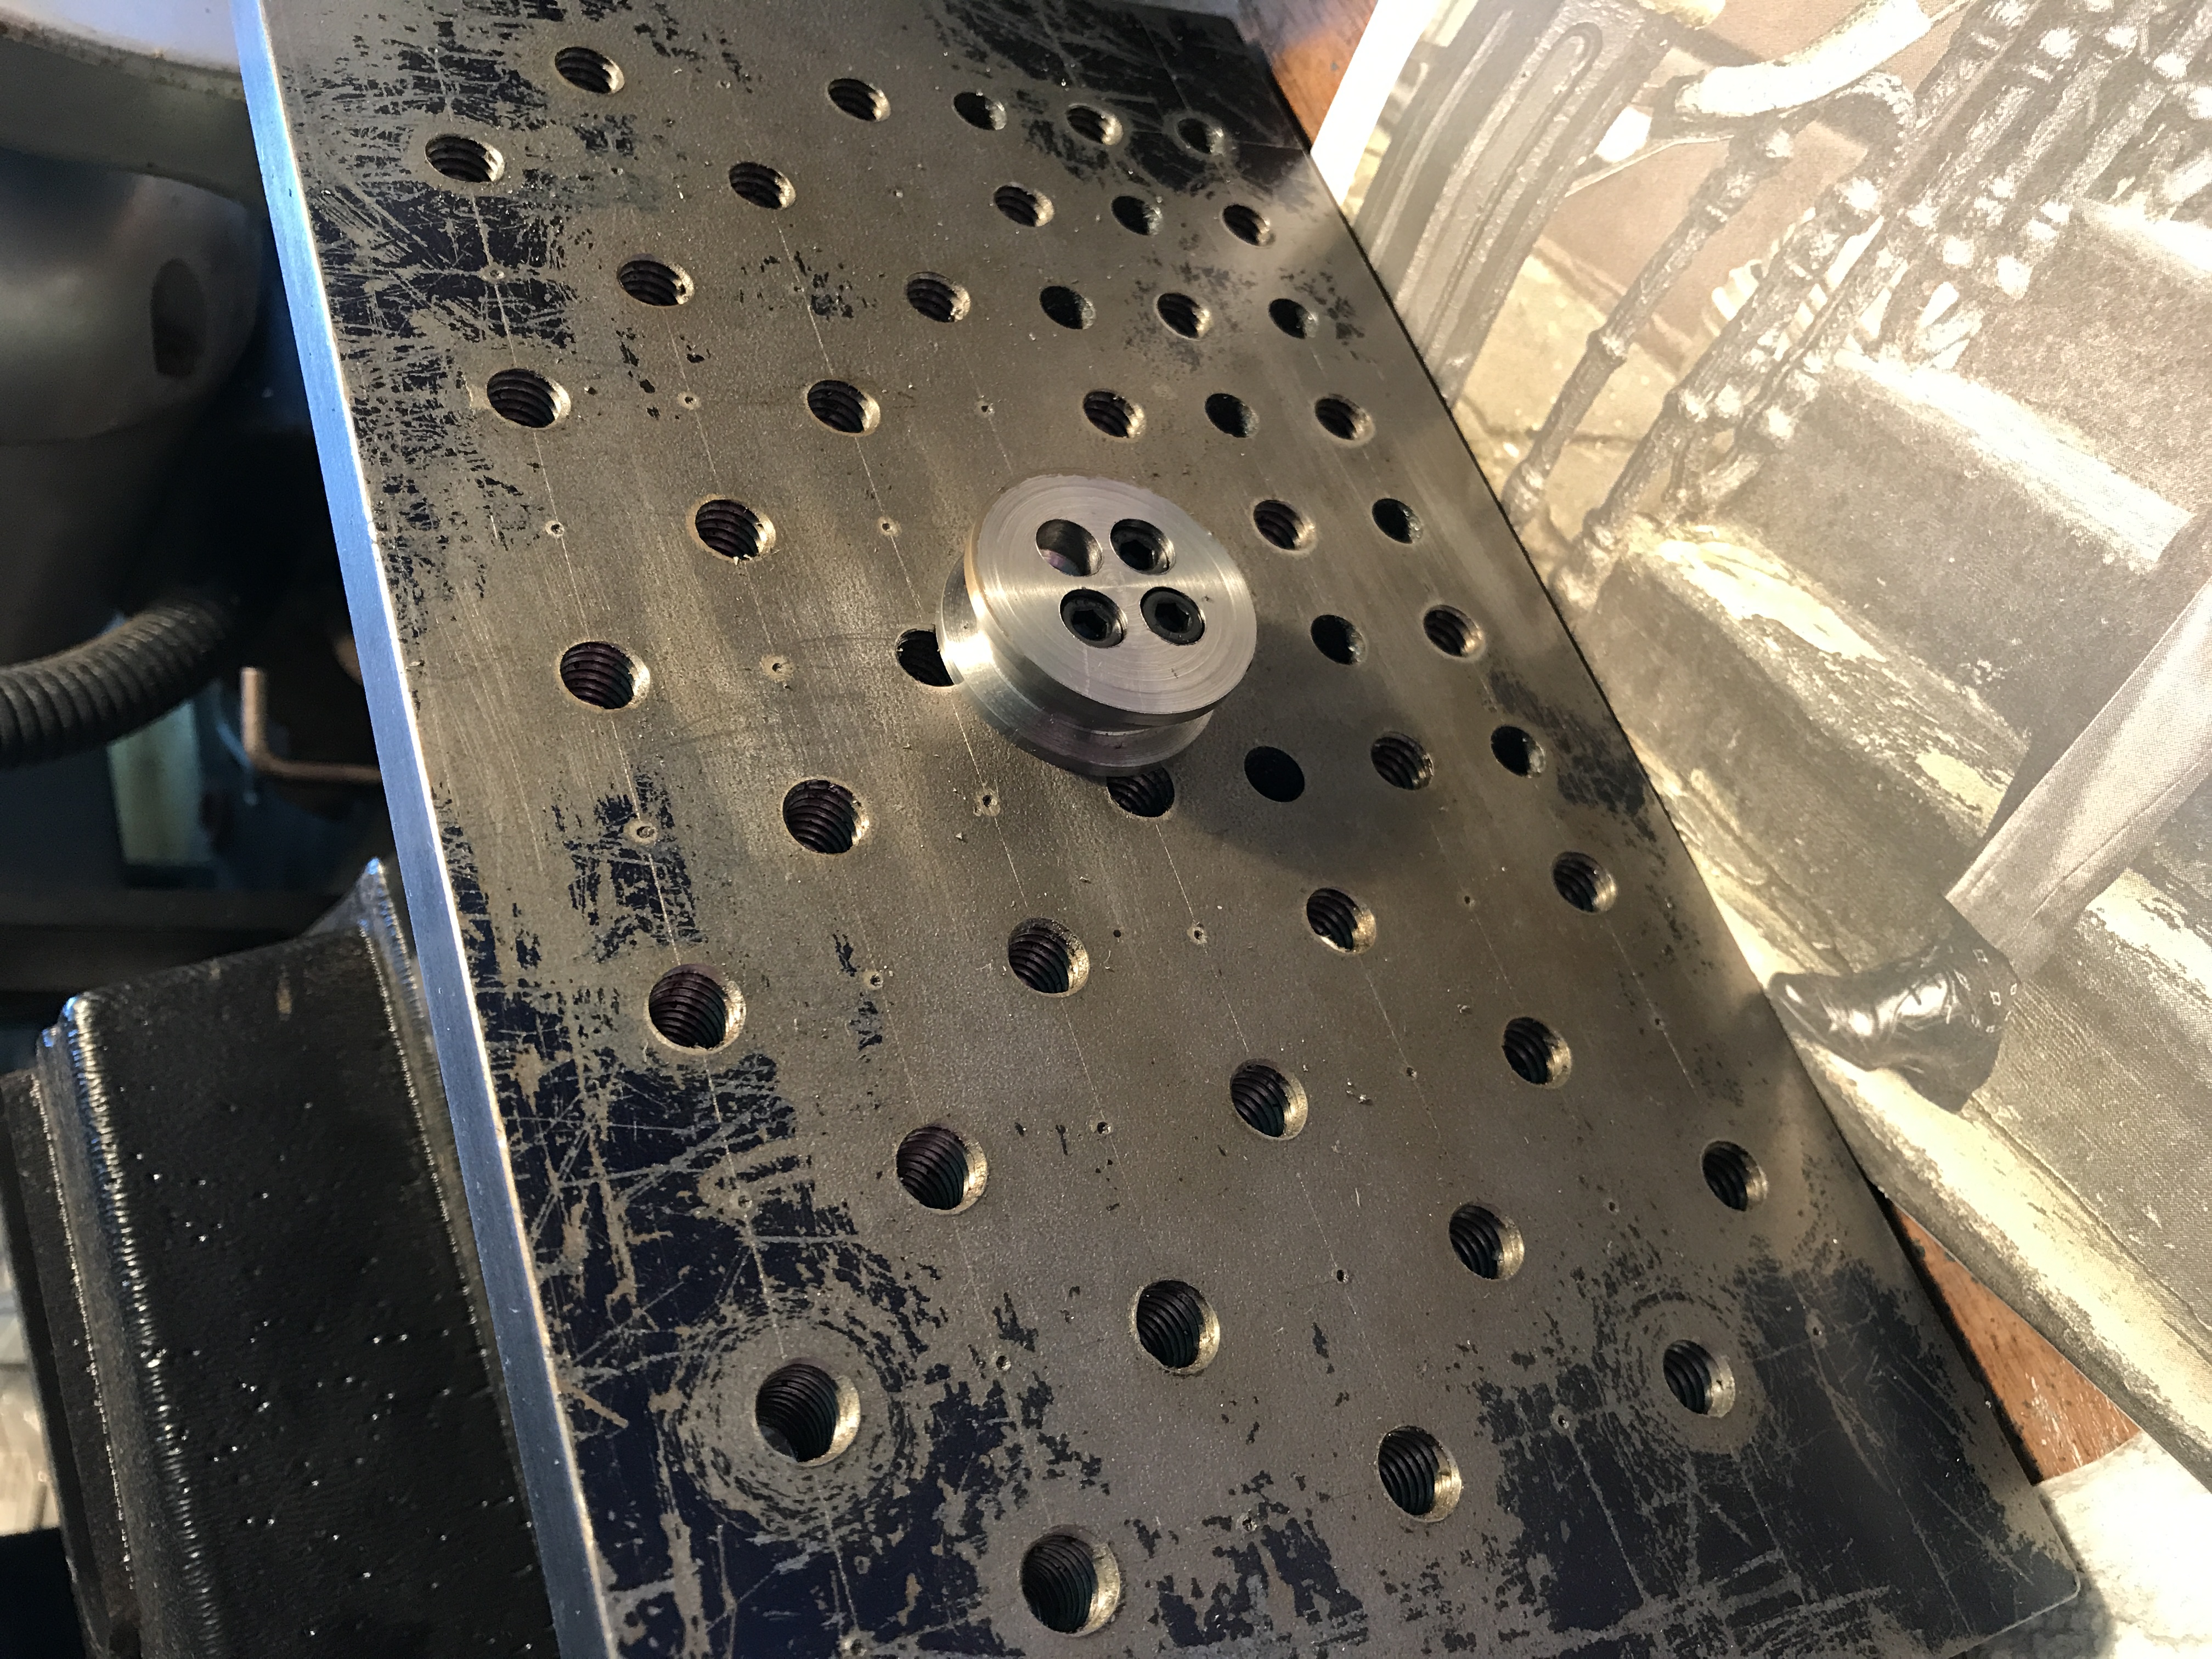
Made the mount per the plans above. A 1" length of 1 5/16" steel rod was cut off in the bandsaw. This was faced on both sides and then one end was reduced to 1.374" for a length of > 0.5". Marks were made at the 0.100 and 0.400 points. The headstock was rotated 30° (Mark on headstock was accurate as measured by protractor.) and the new tool was used to cut the 30° taper. I then marked for the four screws and drilled them through with a 7/32" drill bit and countersunk with a 5/16" drill bit to a depth of 3/16". These holes were used to mark out three holes on the plate after using the first to hold the parts together. The holes in the plate were drilled with a #21 drill bit and tapped 10-32.
Countersinks were drilled on the wrong side of the mount as the drawing was misunderstood!! Oh, well, making the mount in the lathe was rewarding. Need to learn how to use the taper attachment on the South Bend for future taper work.
The construction of the mount was repeated, but the countersinking was done on the correct side of the mount this time. The holes were marked out using the holes already drilled in the plate. After completion screws would only fit in three holes at a time!! Either marked out wrong, unlikely, or one of the holes was not drilled correctly. I need to use the new center drill bits purchased to start holes.
I will use this milling table a few times before deciding whether to add the other two sets of mounting holes in the plate and whether to make the accessory plate riser.